Videoedit.- Username is:
videoeditand Password (case-sensitive) is:Smith232B1
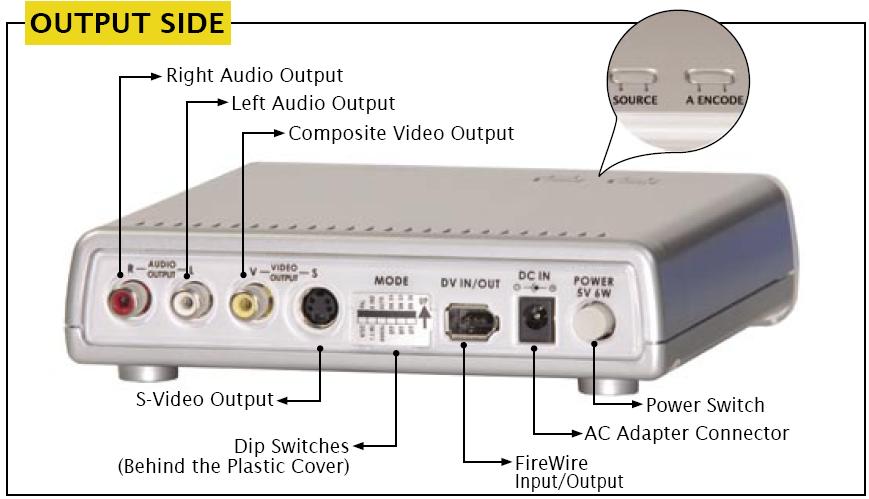
- If it was already on, please turn it off and turn it back on by depressing the power switch on the output (back) side:
Digital Video Device pops up, please click OK.
- Please make sure that, within the dialog box,
Take No Actionis highlighted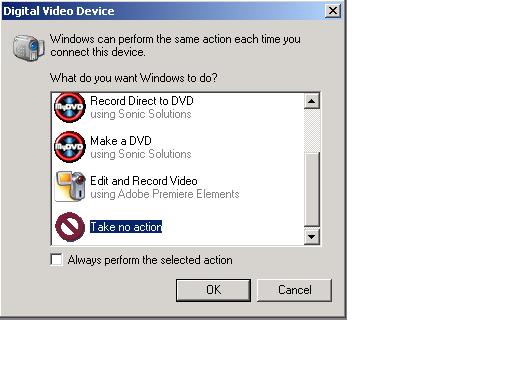
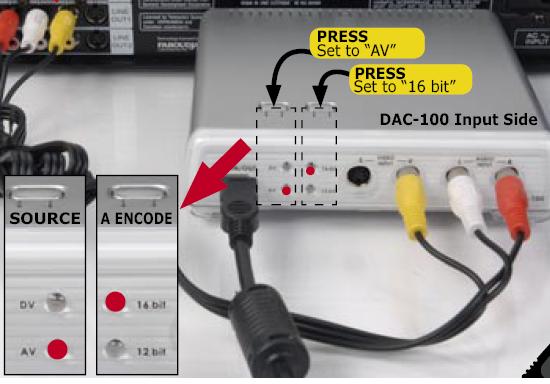
SOURCE button on top of the DAC-100 to switch to AV (Analog Video).
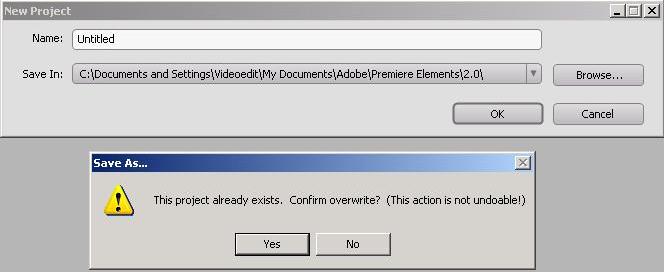
Capture Video button.New Project dialog box pops up, please click OK and then say Yes to the Save As... dialog box that pops up.
- Please note: feel free to save the project as another name or to another location if you feel comfortable doing so.
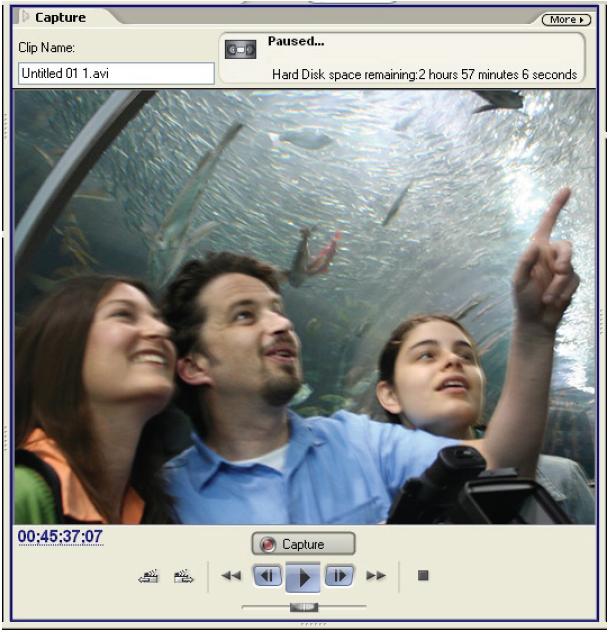
- Please click the
Capturebutton to start recording a clip:
- Please Note: if you cannot see the source video and hear
sound (audio) but do not see pictures (just a black screen), you might need
to try a few things like:
- Ensure that
Colour qualityis set toHighestin the video settings. - Adjust to a higher resolution of display.
- In Windows Media Player, go to the
Tools →
                    Options → Performance
and then move theVideo Accelerationto less thanFullor all the way toNone(alternatively, you could clickAdvanced...there and adjust the overlays).
- Ensure that
- Please Note: if you cannot see the source video and hear
sound (audio) but do not see pictures (just a black screen), you might need
to try a few things like:
- In order to stop the capture, simply click the same button again (it should now say
Stop Capture). - Optional: you may repeat this process multiple times to create many clips, which will be added to the timeline window below.
Export button:
- Please click the
Exportbutton on the toolbar and chooseTo DVDin order to bring up the Burning DVD Dialog box (pictured below). - Please note: if the DVD Burner is not picked up in the DVD
burning dialog box, please do the following:
- Remove the firewire cable connecting the LaCie DVD Burner (NEC ND-2500A) to the PC and then re-insert it.
- After a few seconds, please click the
Rescanbutton to let Adobe Premiere Elements 2.0's DVD burning dialog locate the LaCie DVD Burner. - Once up, you should ensure that
Status:is set toReady, as in the image below:
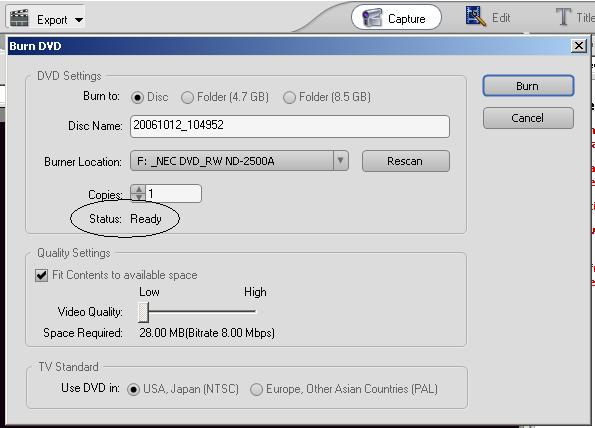
Please Note: you might have to insert a blank DVD (+R/RW only on the LaCie DVD Burner (NEC ND-2500A)) in order to get theReadystatus above.
- Also, please note that the longer the clip you want to burn, the
correspondingly longer time the burn will take. In addition, when you're
doing the actual burn, the last little bit at the end (where it burns the
lead-out) can, and usually does, take quite a long time to finish.
Export button to export to a Quicktime (.mov) or MPEG (.mpg) file.Videoedit.