Java and the Eclipse IDE
- Eclipse IDE Lesson
- Help with Eclipse
- Citrix FAQs
A Quick Lesson on the Eclipse IDE
Getting the Eclipse IDE
If you feel adventurous, you
could also setup your own IDE development environment such as Eclipse,
NetBeans, or the regular
JDK to develop your programs on your own PC. However,
please be aware that if you download your own copy for your own
computer, you will be on your own without support for any installation
problems as well as for any troubleshooting problems. Installing your
own distro and/or Java development environment is certainly an excellent
pedagogical tool but ONLY if you are willing to do your own
support.
That being said, if you do feel ambitious, here are two excellent videos
showing how to download and run Eclipse for Java:
http://www.youtube.com/watch?v=CE8UIbb_4iM
and https://www.youtube.com/watch?v=35NUuhmQuB4.
The steps, in brief, are as follows:
- Install the Java JDK so you have the Java compiler and Java virtual machine ready to go.
To install the Java compiler and virtual machine, install the Java Development Kit (JDK) SE as follows:
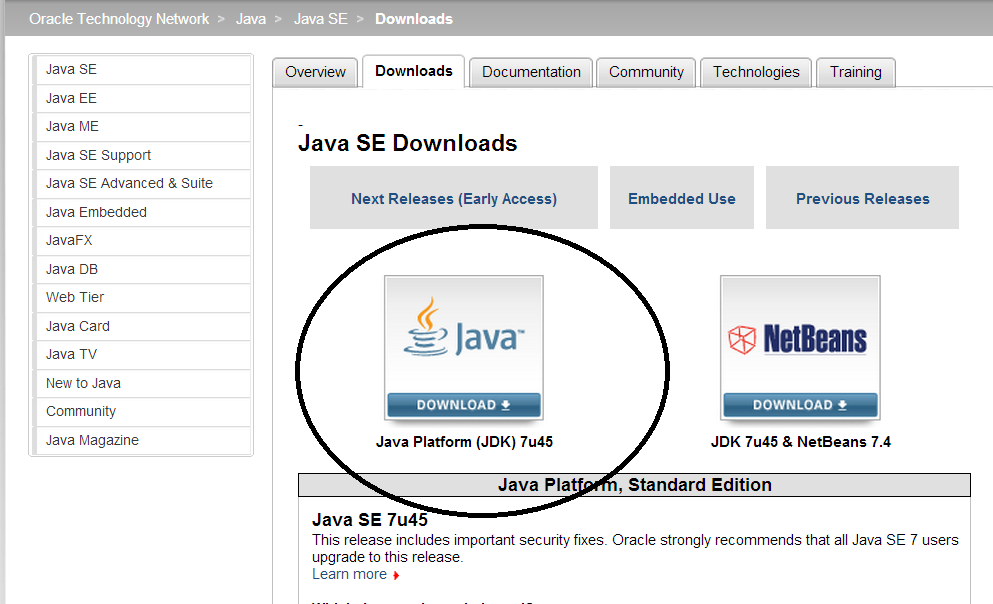
- Go to http://www.oracle.com/technetwork/java/javase/downloads/index.html
- Get the latest SE (Standard Edition) for your platform by clicking the "Download" button, as in the image below:
- On the next screen, accept the License Agreement and download the version for your OS platform
- Run the installer executable and follow the prompts, accepting default options
- Installation is now complete! You do not need to register. You do not need the installer after this step and can double-click
eclipse.exe to get started
- Download Eclipse IDE for Java Developers
- Extract from the zip folder into a folder of your choosing
- Click on
eclipse.exe to execute, no install required
Helpful Links for Installing/Using Eclipse
Some good links for getting and using Eclipse:
Eclipse IDE Organization
The Eclipse IDE organizes your Java source code using the following hierarchy:
- Workspace – a folder containing Java Projects
- Projects – a group of Packages
- Packages – a group of classes
- Classes – your source code file(s)
- Console – to display your printed output and accept the user's input
Eclipse User Interface
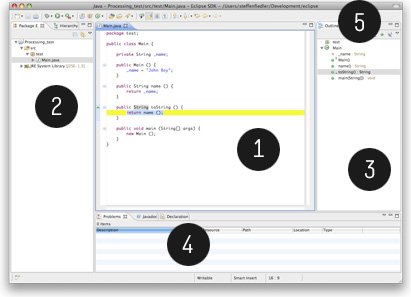
- EDITOR: Placed in the center, the editor is the heart of eclipse.
-
PACKAGE EXPLORER: The package explorer gives an overview of the
projects and their contents. Close projects you currently don't need to
keep Eclipse fast. If your project content isn't displayed in the correct way
(with packages, referenced libraries, etc.), you are likely in the wrong
perspective (see point 5 below).
-
OUTLINER: The outliner shows the structure of the selected class.
Use the sorting and display properties at the top to modify the view. By
clicking on a list item, the cursor in the editor will move to the selected
property or method. Also available are the import
declarations, which reference the other classes your classes/objects need to work.
-
CONSOLE/PROBLEMS: If the Eclipse IDE thinks that your code needs some work,
it will leave you a detailed message in the Problems tab. Also in this
part of the screen, the Console will print the
print and println commands used in your Java source code.
-
SWITCH PERSPECTIVES: In the upper right part of the Eclipse
IDE you are able to switch to other perspectives. Each plugin (mostly for other programming languages) has
its own rendering mode for Eclipse. You can switch perspectives by
either choosing
Window → Open Perspective → Other
or by clicking the buttons at the far right on the toolbar.
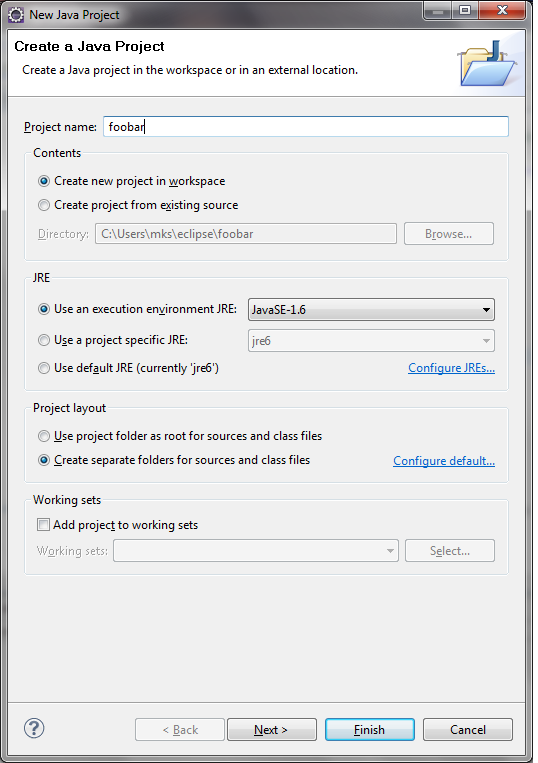
How to Create New Projects
-
From the File menu choose: New -> Java Project

- Use the default project settings and press the Next button; the Java Settings dialog box will appear.
-
The Java Settings dialog box allows you to configure the build
settings for your project. Use the default settings
and press the Finish button.
The Workbench, Tabs, and Perspectives
- Different informational tabs can be display within the IDE.
- The area where tabs are displayed is called the workbench.
- To see a list of available tabs select the Window menu and then the Show View item.
- The tabs displayed within the
IDE’s workbench are called a perspective. You can customize your
workbench with your favorite tabs and save the arrangement as a customized
perspective by Using the menu item Window > Save Perspective As.
- Or, you can
use Eclipse’s predefined perspectives. The predefined perspectives
include Debug, Java and Java Browsing. The Java Browsing perspective is
interesting because it provides a tab display of Projects, Packages, Types (classes)
and class members. Clicking on an item in a ‘parent’ tab will display
items in the ‘child’ tab. For example, clicking on a package name
in the Package Tab will display the package’s classes in the Types tab.
How to Add a Package to a Project
- Select your Project from the Package Explorer Tab
-
Right-Click on the Project and choose New -> Package
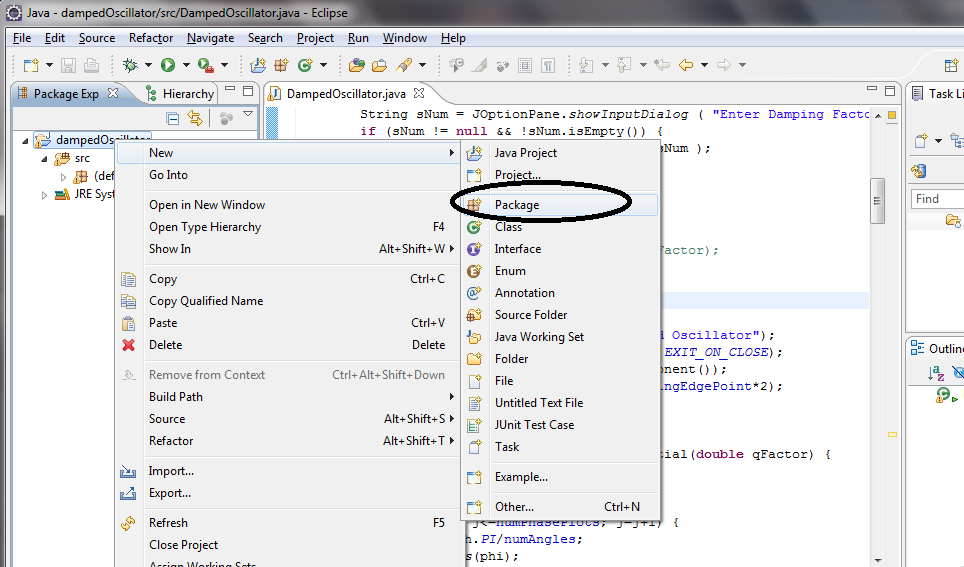
- Assign the package a meaningful name and press finish
How to Add a Class to a Package
- Right-click on the package to which you intend to add a class
-
Choose New -> Class from the menu
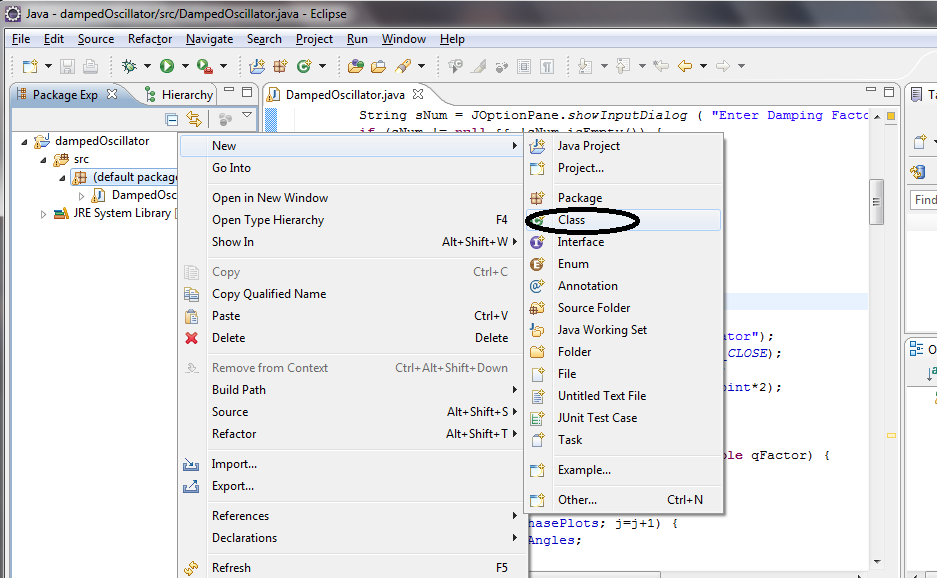
- In the New Class dialog box assign the class a name
- Include a method stub for
public static void main(String[] args)
- There is no need to change any of the other options. Press the Finish button
Enter your Source Code into a Class Source Code File
- Select the source code file you wish to open (the extension is .java).
-
Right-click on the file and from the menu choose Open
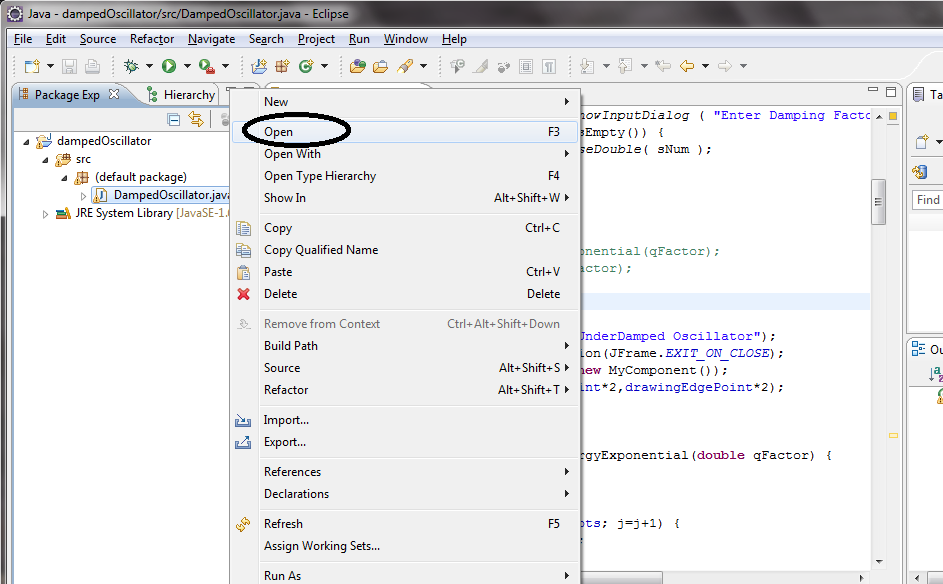
- Modify and save your source code
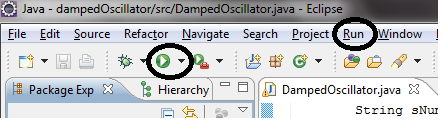
How to Execute Your Code
-
Press the Arrow button in the Tool
bar or choose Run from the Menu Bar. You can also use the key combination
ctrl-F11.
How to Debug Your code
-
Set break points by right-clicking
in the right-hand blue margin of the source code editor and choose Toggle
Breakpoint.
- Start the debugger by pressing the F11 key
- When a break point is reached you can:
- Step into (F5)
- Step over (F6)
- Resume Execution (F8)
- A variable’s value can be viewed in the Variables Tab or by hovering your cursor over the variable.
- You can copy and paste code into the Expressions Tab to view the result of an expression or the value of a variable.
- In the source code editor syntax errors are underlined in red.
- Hovering your cursor over the underlined text will display a context sensitive dialog box with suggestions on how to fix the error.
Help with Eclipse
-
EXCELLENT video showing how to download and run Eclipse for Java: http://www.youtube.com/watch?v=CE8UIbb_4iM
- For Eclipse: Go back to the eclipse welcome screen and try the helloworld tutorial. This really helps you with navigating through eclipse.
- Eclipse offers an excellent documentation and tips which can be found within the help menu.
- Refer to the online documentation at the Eclipse website.
- Google the terms
Eclipse and Java. There are many flash tutorials and websites online.
- C++ vs. Java: http://www.computing.dcu.ie/~renaat/projects/cvjava.html
- Search Youtube.com using the terms Eclipse and Java.
- Video Tutorials on using the Eclipse IDE
Citrix FAQs
-
Login for Citrix: As we get into Java,
we will use Citrix to
access the Eclipse IDE.
The login for students is your D# (with capital D) as your Username and year
and month of your birthday (in the YYYYMM format) as your password.
For instructors, it's
dvuadmin\
followed by your D# (with capital D) as your Username. You use your hire
date in YYYYMM format followed by @D (or your webmail password).
-
Copying a file FROM your computer TO Citrix: https://hub2.devry.edu/SavingFilesFromCitrix
In brief, Citrix maps the local drives on your machine as V:, etc., as in the following image:
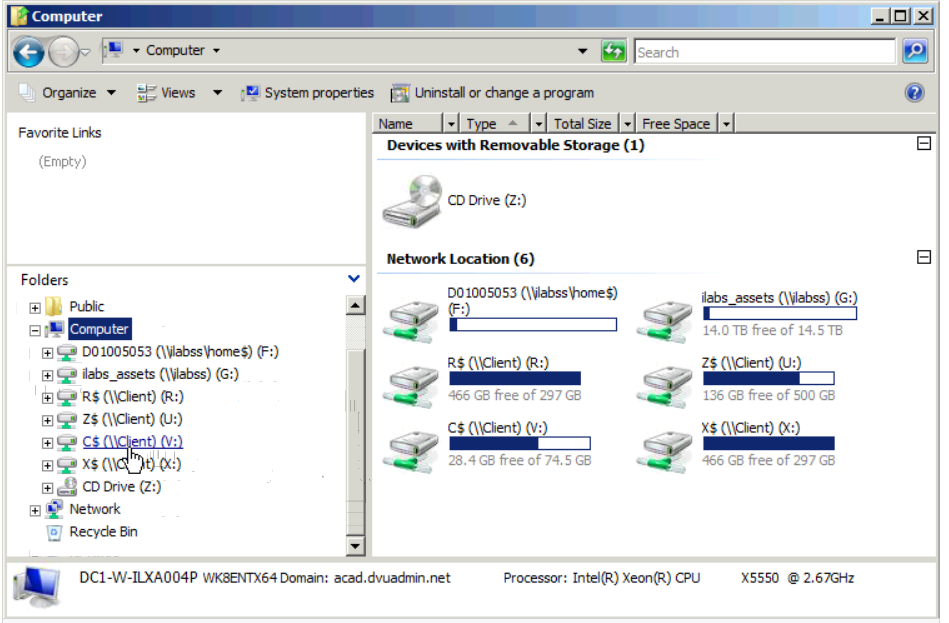
Here, you're in the Windows Explorer on Citrix and your
Citrix drive is called F:. Your local Windows machine's
C: drive is mapped as the V: drive and you
can copy back and forth between the two. If you have more than one
drive on your local machine, they'll be mapped similarly to V:.
So the procedure is to copy a file FROM the V: drive TO the F: drive.
-
Copying a file FROM Citrix TO your computer: https://hub2.devry.edu/CopyingFilesFromCitrix
The procedure is basically the same as above except you copy FROM your F: drive TO your V: drive.
- Fixing the
Workspace in use or cannot be created, choose a different one error:
http://viralpatel.net/blogs/2009/10/eclipse-workspace-in-use-or-cannot-be-created-error.html
If you have verified that there is no other Eclipse
process running and yet still see the error message, it may be due to
a permissions problem or an operating system lock release problem
(e.g., on Windows) and the sure-fire remedy is to simply delete the
.lock file and restart Eclipse.
Another little hint/tip, which might get outdated soon:
If anyone is having issues with the Eclipse over Citrix,
you might have to change the work drive to f:\workspace
to get it to work. Please also note that your host computer is on the v:\
drive, in-case you need to move any saved files.
You might need to use File -> Switch Workspace.
You might also need to change the workspace to the "Client" V: drive and then drill down to find the folder you want to use.
- Please also see the Java-specific FAQs or the complete FAQs
Ricky J. Sethi, PhD <rickys@sethi.org>
Last updated: Saturday, January 17 2015
(www.sethi.org/tutorials/tutorial-using_eclipse_ide.shtml)